Remote SSH Raspberry Pi: A Complete Guide
Can you truly manage your Raspberry Pi from anywhere in the world, with just a few clicks? The answer is a resounding YES. Secure Shell (SSH) provides the key to unlocking this capability, transforming your single-board computer into a remotely accessible powerhouse.
In todays digitally driven era, the ability to remotely access and control your devices isn't merely a convenience its a necessity. Whether you're a seasoned developer, a passionate hobbyist, or a diligent IT professional, the capacity to troubleshoot network issues, manage servers, or simply access your files from afar is invaluable. This guide is designed to be your comprehensive companion in navigating the intricacies of establishing secure remote access to your Raspberry Pi via SSH. We'll delve into every aspect, from the fundamental setup to the more advanced security measures, ensuring a stable, protected, and seamless connection.
| Topic | Remote SSH Raspberry Pi |
| Description | A secure method for remotely accessing and controlling a Raspberry Pi device over the internet using the SSH protocol. |
| Key Components | Raspberry Pi, Secure Shell (SSH), Internet Connection, Router, Dynamic DNS (optional). |
| Purpose | To enable remote management, file transfer, command execution, and system administration tasks on a Raspberry Pi from any location with an internet connection. |
| Benefits | Convenience, flexibility, security, and cost-effectiveness for various applications like home automation, server management, and development. |
| Technical Aspects | Involves enabling SSH on the Raspberry Pi, configuring port forwarding on the router, securing the SSH connection (changing default port, disabling root login, using public key authentication), and utilizing dynamic DNS (optional). |
| Potential Challenges | Requires proper configuration of the router, maintaining network security, and troubleshooting connection issues. |
| Applications | Home automation (controlling devices, monitoring sensors), server hosting (web servers, game servers), software development and testing, and IoT projects. |
| Reference | Raspberry Pi SSH Documentation |
SSH, or Secure Shell, stands as a cornerstone in the landscape of secure network communication. It's a cryptographic network protocol, diligently designed to ensure that communication between devices across an unsecured network remains both secure and private. This is achieved through encryption, safeguarding the integrity and confidentiality of data, while simultaneously verifying the identity of the communicating parties. SSHs versatility has made it a standard for remote command-line access, seamless file transfer, and the creation of secure tunnels.
- Sydney Sweeney In Handmaids Tale Casting Rumors Explored
- Exploring Sexy Open Video Films What You Need To Know
For the Raspberry Pi enthusiast, SSH is more than just a tool; it's the gateway to unlocking the full potential of their device, irrespective of physical location. Imagine controlling your Raspberry Pi from across the globe, without the need for direct, physical access. This is particularly advantageous for headless setups, where the Pi operates without a connected monitor or keyboard. SSH empowers users to manage files, install software, and execute administrative tasks with unparalleled ease and efficiency.
Consider the myriad reasons why SSH is a superior choice for managing your Raspberry Pi:
- Security: SSH employs robust encryption to protect all transmitted data, shielding it from prying eyes and unauthorized access. It's a digital fortress for your sensitive information.
- Convenience: With SSH, the physical constraints of location vanish. Manage your Raspberry Pi remotely, liberating you from the need for physical proximity.
- Flexibility: SSH supports a vast array of commands and tools, empowering you to perform complex tasks with remarkable ease. Its your digital Swiss Army knife.
The Raspberry Pi, a marvel of modern engineering, is a single-board computer that has captured the imagination of hobbyists, educators, and professionals worldwide. Its compact size, affordability, and versatility have cemented its place as a vital tool in various fields. Developed by the Raspberry Pi Foundation, this credit-card-sized computer packs a powerful punch, with a processor, GPIO pins, and diverse connectivity options that open doors to an array of projects.
- Nightmare Before Christmas Characters A Spooky Guide
- Magic Mountain Your Ultimate Guide To Thrills Fun
The beauty of the Raspberry Pi lies in its adaptability. It can run a spectrum of operating systems, including Raspbian (now Raspberry Pi OS), Ubuntu, and others. This flexibility allows users to tailor their setup to meet their specific needs, making it a perfect platform for experimentation, learning, and development.
Let's delve into the core specifications that make the Raspberry Pi a compelling choice:
- Processor: Typically a Broadcom BCM2835 or its successors.
- Memory: Varies across models, generally ranging from 512MB to 8GB.
- Connectivity: Ethernet, Wi-Fi, and Bluetooth are standard features.
- Storage: Relies on a MicroSD card for storage.
Before you can remotely access your Raspberry Pi over the internet, you must first enable SSH on the device. This process is straightforward and can be completed either through the graphical interface or via the command line interface (CLI).
Method 1: Using the Raspberry Pi Configuration Tool
- Begin by accessing the Raspberry Pi Configuration tool. It can typically be found within the Preferences menu.
- Navigate to the "Interfaces" tab within the configuration tool.
- Select "SSH" and ensure it is set to "Enabled."
- Reboot your Raspberry Pi to ensure the changes take effect.
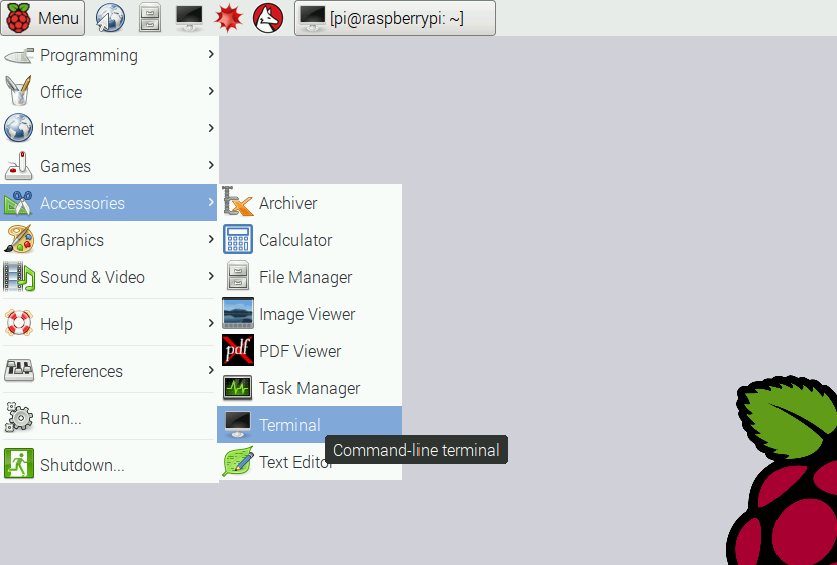
Method 2: Enabling SSH via the Terminal
If you are using a headless setupone without a connected monitor or keyboardyou can still easily enable SSH using the terminal. Simply run the following command:
sudo systemctl enable ssh
This command ensures that the SSH service will automatically start whenever your Raspberry Pi boots up. Furthermore, you can manually start the SSH service at any time using the command:
sudo systemctl start ssh
Securing your SSH connection is a paramount concern when establishing remote access over the internet. Without taking the necessary precautions, your device could become vulnerable to unauthorized access, exposing it to potential risks. Here are some crucial steps you can implement to fortify your SSH connection:
1. Alter the Default SSH Port
By default, SSH operates on port 22. Changing this to a non-standard port is a potent deterrent against automated attacks. To make this change, you must edit the SSH configuration file:
sudo nano /etc/ssh/sshd_config
Within this file, locate the line that reads "Port 22" and modify the number to your desired, non-standard port. Save the file, and then restart the SSH service to activate the changes:
sudo systemctl restart ssh
2. Disable Root Login
Allowing root login via SSH is a significant security vulnerability. To mitigate this risk, edit the SSH configuration file and set the "PermitRootLogin" option to "no." After making this change, restart the SSH service.
3. Implement Public Key Authentication
Public key authentication offers a far more secure alternative to password-based authentication. To set it up, generate a key pair on your local machine:
ssh-keygen -t rsa -b 4096
Next, copy the public key to your Raspberry Pi:
ssh-copy-id pi@your_raspberry_pi_ip
To enable access to your Raspberry Pi over the internet, youll need to configure port forwarding on your router. The specific steps vary depending on your router model; however, the general process remains consistent:
- Log into your router's web interface using your credentials.
- Locate the port forwarding settings, often under a menu labeled "Advanced" or "Security."
- Create a new rule, specifying the internal IP address of your Raspberry Pi and the SSH port (usually port 22 or the custom port you set).
- Save the changes and test your connection from outside your local network.
Most home internet connections utilize dynamic IP addresses, which change periodically. To maintain a stable connection to your Raspberry Pi, especially when accessing it remotely, consider using a Dynamic DNS (DDNS) service. DDNS services map a domain name to your changing IP address, which allows you to connect to your Raspberry Pi using a consistent URL, regardless of IP address changes.
Here are some popular DDNS providers to consider:
- No-IP
- Dynu
- duckdns.org
After signing up for a DDNS service, configure it either on your router or directly on your Raspberry Pi to ensure your chosen domain name always resolves to your current IP address.
While SSH stands as the primary method for remote access, other tools can be employed to suit various needs and preferences. Here are a couple of alternatives:
1. VNC (Virtual Network Computing)
VNC empowers you to remotely access the graphical desktop environment of your Raspberry Pi. This is particularly useful for tasks requiring a graphical interface.
2. Web-Based Interfaces
Certain applications, such as Home Assistant, offer web-based interfaces that you can access through a web browser. This approach eliminates the need for SSH or VNC, streamlining the access process.
Even with meticulous planning and execution, issues can arise when establishing remote SSH access. Here are some common problems and their corresponding solutions:
1. Connection Timeout
If you encounter connection timeouts, verify these key points:
- Ensure that SSH is enabled on your Raspberry Pi.
- Confirm that port forwarding is correctly configured on your router.
- Verify that your firewall is not blocking the SSH port.
2. Permission Denied (Public Key)
This error often indicates a misconfiguration of public key authentication. Carefully double-check that your public key has been correctly added to the authorized_keys file on your Raspberry Pi.
To ensure a smooth and secure experience, consider these best practices:
- Regularly update your Raspberry Pis software to patch security vulnerabilities.
- Use strong, unique passwords for all user accounts.
- Monitor your SSH logs for any suspicious activity.
- If feasible, limit SSH access to trusted IP addresses.
Setting up remote SSH access to your Raspberry Pi over the internet is a valuable skill, enhancing your productivity and expanding the capabilities of your device. By adhering to the guidance within this article, you can establish a secure and reliable connection, allowing you to manage your Raspberry Pi from anywhere in the world.
As you continue your journey with the Raspberry Pi, explore additional tools and techniques to further enhance your setup. Whether automating tasks with scripts, setting up a home server, or building IoT projects, the possibilities are truly limitless.
We encourage you to share your experiences and insights in the comments below. Your feedback helps us improve and provides valuable information to other readers.
References:
- Raspberry Pi SSH Documentation
- Secure Shell (SSH) - Wikipedia
- No-IP Dynamic DNS

Detail Author:
- Name : Mallory Boyle
- Username : owiegand
- Email : ervin.labadie@boyer.com
- Birthdate : 2002-12-25
- Address : 8549 Otha Mall Lake Daphney, LA 62644
- Phone : 1-469-912-1135
- Company : Fahey Inc
- Job : Data Processing Equipment Repairer
- Bio : Consequatur cupiditate in quod amet voluptatem aut. Id porro beatae cupiditate. Esse velit excepturi magnam officiis ipsum vel excepturi.
Socials
facebook:
- url : https://facebook.com/ophelia.kshlerin
- username : ophelia.kshlerin
- bio : Consequatur voluptatem quod omnis nulla qui voluptatem aut eum.
- followers : 3729
- following : 104
instagram:
- url : https://instagram.com/ophelia_xx
- username : ophelia_xx
- bio : Magnam mollitia ipsam neque accusamus ad. Velit ducimus quo ut ut voluptas nisi.
- followers : 6310
- following : 818
linkedin:
- url : https://linkedin.com/in/okshlerin
- username : okshlerin
- bio : Tempore qui iusto debitis exercitationem.
- followers : 5181
- following : 615

 provides the key t)